



LEGO Pet Shop (10218) Modifications
October 31, 2017
How to Maximize Vertical Space for a LEGO City
November 1, 2017
If you are thinking of building a brick city, this article discusses the first three basic steps on how to build a LEGO city.
CHOOSE THE SPACE FOR YOU LEGO CITY
Finding the right space for your LEGO city is important for a satisfactory result and for viewing. Of course, you ideally want to find the biggest space that you can afford (or are allowed).
The number one concern when building your LEGO city in a small space is… the space!
One of the design principles of building a small brick city is to maximise space and use it efficiently.
Finding the right space for your LEGO city is important for a satisfactory result and for viewing. Of course, you ideally want to find the biggest space that you can afford (or are allowed).
The size and shape of the space you have depends on your home, office or location that you are building your city in. You can even have several different spaces in your place to hold different sections of your brick city. There is no reason why the city must be all in one single location.
For ease of building and layout, a straight long space is better than a wide squarish space. A space that allows you to set your display without any right-angle turns is preferred. But, if the only space that you have has a turn, like in the corner of a room, you must work with what you have.
When choosing and/ or creating your space, measure the space in terms of LEGO base plate sizes. The standard base plate size is 32 x 32 studs which measures 10.1” x 10.1” or 25.6cm x 25.6cm. The standard half base plate measures 16 x 32 studs, which measures 5” x 10.1″ or 12.8cm x 25.6cm. There is also a larger 48 x 48 studs base plate that measures 15.1” x 15.1” or 38.4cm x 38.4cm.

Standard LEGO base plates. 48 x 48 (grey), 32 x32 (tan) and 16 x 32 (blue)
As these are standard base sizes from LEGO, it is ideal that you try to find a space that fits these base plate sizes as close as possible from each side. If the space is just one or two inches short of allowing you to put a base plate at the end, try to create more space by moving furniture or look for another location.
I highly recommend that you choose and allocate your space based on the standard base plate sizes. This allows your city to be modular and makes it easy to move building positions. Having an odd-sized and odd-shaped builds space will make changes to your city difficult.
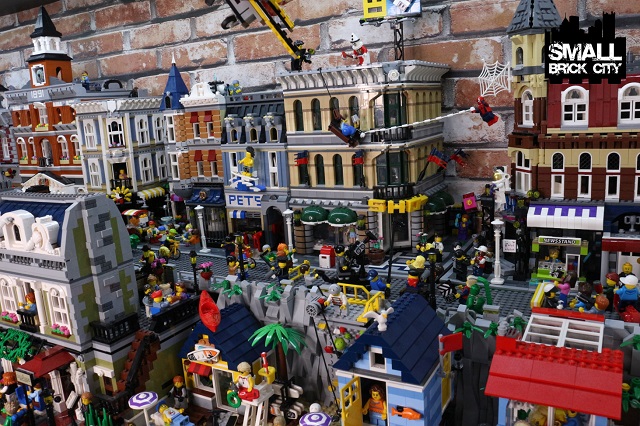
If your space allows you to create a set-up which you can walk around the city, that is great. But, bear in mind, the walk-around space can be used as real estate for your city. It might be more efficient to set your city against a wall to maximize space.
Check out this useful article on what the minimum space for a LEGO city is.
CHOOSE YOUR FURNITURE
The furniture that your LEGO city is built on is just as important as the LEGO sets that make up the city especially if you want to build a city in a small space. So, do not overlook the importance of the furniture.
There are two considerations when choosing furniture – form and function. Form refers to the aesthetic look of the furniture and function refers to the use it serves. Function is, of course, more important. The furniture must fit and hold your LEGO city level and with stability.
For the main layout, the most common type of furniture is to use tables. When it comes to the size of the table, you need to choose a size that fits your space. Once again, you want to maximize the space so get the biggest table that will fit the space you have.
You might not find a table size that fits your space perfectly, so, you might have to get two smaller tables instead of one big one and configure them to fit your space.
If you are buying tables “off the shelf”, my suggestion is to buy identical tables that are easily available or buy tables of different sizes but from the same manufacturer and product range. Look for legs that have straight legs down without cross bars.
Ikea is a great source of inexpensive tables and the sizes are quite standard across models over the years.
I did a quick search online for current Ikea tables in season. The smallest standard table is 120cm x 60cm. This basically holds 4.5 base plates (32 x 32 studs) by 2 plates (32 x 32 studs). There is also a slightly larger tabletop at 155cm x 75cm that can hold 6 base plates (32 x 32 studs) x 3 base plates (32 x 32 studs).
As mentioned, you can also join different tables together in different configurations to maximize and fit your space.
Instead of buying ready-made tables, you can also consider custom building the furniture to specific sizes to fit your space. It can be as easy as buying ply and lumber and having them cut to size. If you are handy, you can then take the material and assemble the table(s) yourself with wood screws and an electric drill. Use rubber pads or plastic leveling pieces under the legs to ensure the table is level.
You can also have a carpenter fabricate the furniture professionally for you and build it into the space you have. Having your tables custom built to fit your space is of course the surest way to maximize the space you have.
If your LEGO city display is in a public space such as a living room or in the reception area of an office or restaurant, the aesthetic look of your furniture is important as it should look presentable and complement the interior decoration of the place.
CHOOSING YOUR BUILDS & PLANNING THE CITY LAYOUT
Once you have a chosen your space and furniture, you need to choose the builds for your LEGO city. To start off, you will likely start with the LEGO modular buildings. Check out this article on the best LEGO modular buildings to start with.

Assuming you have an idea of the builds you want to include in your city, you need to plan the city layout.
One way to help visualize your layout and work it out efficiently is to cut up squares or rectangles from pieces of paper or card to represent the sets in your city. Cut the pieces of card to scale based on their length and width. Write the set name on each card along with its height.
Next, draw out (to scale) the outline of the area space you have allocated for your LEGO city on a large piece of paper. You can now put the different cards representing the sets you want to get and position them on the map of your city layout.
Try out different configurations and move pieces around to see what works best. Once you finalize a couple of possible layouts, draw out roads and other features you would like to add onto the “map”. This will allow you to visualize your city even better and see if it flows well.
Once you work out how your city should be laid out and how different sets can fit together, you can start acquiring the necessary sets and parts.
This process will help you save money so that you do not buy sets that cannot physically fit in your city due to space constraints.
If you found this article useful, you might want to check out my book “Bricks for Small Places” as I detail how to design and build a LEGO city in a small space. I share practical design principles gleamed for 2 decades of workings as a production designer for stage & entertainment.
Subscribe to read the preview of the book.

Available as a printed book or instant download.
Do check out the latest update on our LEGO city to see space is fully maximized to create an awesome custom LEGO city.


1 Comment
[…] is Part 2 of “How to Build a LEGO City“. Check out Part 1 here. In this article, we explore where to get buildings for a LEGO […]